I’ve been reading up on continuous delivery and the GoCD tool is a great way to learn the concepts and abstractions to help model your delivery pipeline and work towards improving it.
This post documents setting up a .NET core project in GoCD in a minimal way for demo purposes. I cover setting up a hello world app and simple scripts to build, test, and package. Then I will create a pipeline in GoCD to build our site and run unit tests. Finally I’ll show how to add additional pipelines for manual acceptance tests and deployment.
If you want to know about my environment and .NET core project for this demo you can read the next section Demo Environment Setup. If you want to just jump ahead to the GoCD you can scroll down to the GoCD Setup or GoCD Pipelines sections.
Demo Environment Setup
Demo Environment
For this post I’ll be using the following file structure:
Where I keep my development git repo.
C:\demo\development
Where I will keep my bare git repo to be used as GoCD material.
C:\demo\git_server
Material Setup
First I’ll setup a file based git server in C:\demo\git_server. I’m just doing this for simplicity. You could also use Github or another SCM server.
mkdir hwapp

cd hwapp

git init --bare
Then I’ll setup a share so the git repo can be used as a material and cloned into my development folder.
\\lenovo-pc\git_server\hwapp
Then clone that into my development folder.
cd development

git clone \\lenovo-pc\git_server\hwapp
Now we will just setup the hello world .NET Core app.
cd hwapp

dotnet new
Then run it to make sure everything is working.
dotnet restore

dotnet run
Add a .gitignore file.
.gitignore
bin/
obj/
project.lock.json
_build
To keep things simple I won’t use a build tool and just write a few small windows commands.
build.cmd file.
build.cmd
git clean -xfd

dotnet restore

dotnet build
test.cmd file.
test.cmd
dotnet test
package.cmd file.
package.cmd
IF [%1] == [] GOTO error
@Echo Off
dotnet pack -o _build --version-suffix %1
EXIT /B
:error
Echo version required.
Add some example unit tests using Xunit.net:
Here is my updated project json to allow me to run xunit tests.
{
  "version": "1.0.0-*",
  "testRunner": "xunit",
  "buildOptions": {
    "emitEntryPoint": true
  },
  "dependencies": {
      "xunit": "2.1.0",
      "dotnet-test-xunit": "1.0.0-rc2-build10025"
  },
  "frameworks": {
      "netcoreapp1.0": {
          "dependencies": {
              "Microsoft.NETCore.App": {
                  "type": "platform",
                  "version": "1.0.0-rc2-3002702"
              }
          },
          "imports": [
              "dnxcore50",
              "portable-net45+win8"
          ]
      }
  }
}
Add xunit tests.
tests.cs
using Xunit;

namespace MyFirstDotNetCoreTests
{
    public class Class1
    {
        [Fact]
        public void PassingTest()
        {
            Assert.Equal(4, Add(2, 2));
        }

        int Add(int x, int y)
        {
            return x + y;
        }
    }
}
Now the build, test, package cmds should work. Test and commit and push that to origin.
git add -A

git commit -m 'initial hello world app'

git push origin master
GoCD Setup
Note: For windows users I would suggest a simple file path without spaces. I’ll use C:\demo\GoCD\Server and C:\demo\GoCD\Agent for the install and host it on localhost.
Getting up and running with GoCD is simple. Download the server and agent and run the installers. Once it is running your GoCD server should be available at http://localhost:8153 or http://your-server-installation-hostname:8153. Verify the server and agents are working by visiting the site and checking the agents tab.
Now that the test environment is setup we can start adding a pipeline.
GoCD Pipeline
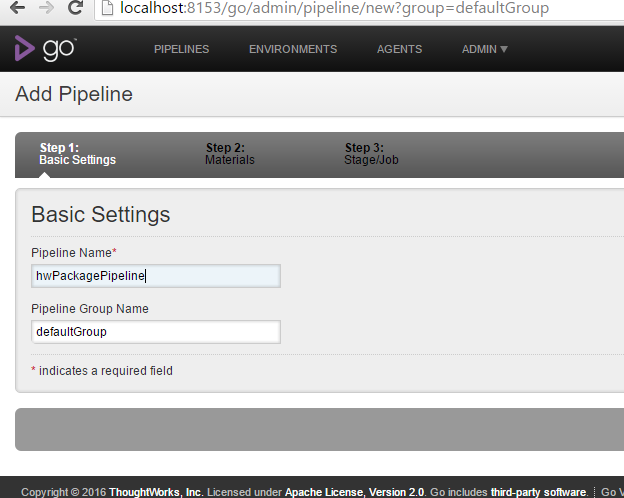
Initial setup of the “HwPackagePipeline” pipeline which will contain the stage/job/tasks to do the build, test, and package.
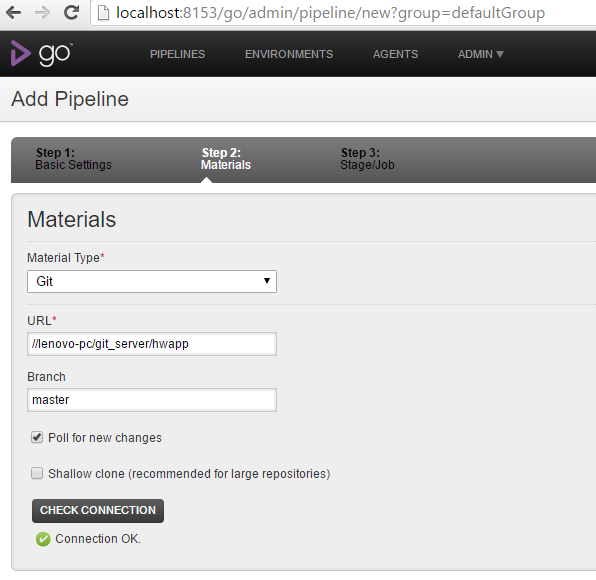
The second page is how you setup the material in GoCD. Here I’ve added my git repo endpoint and tested the connection.
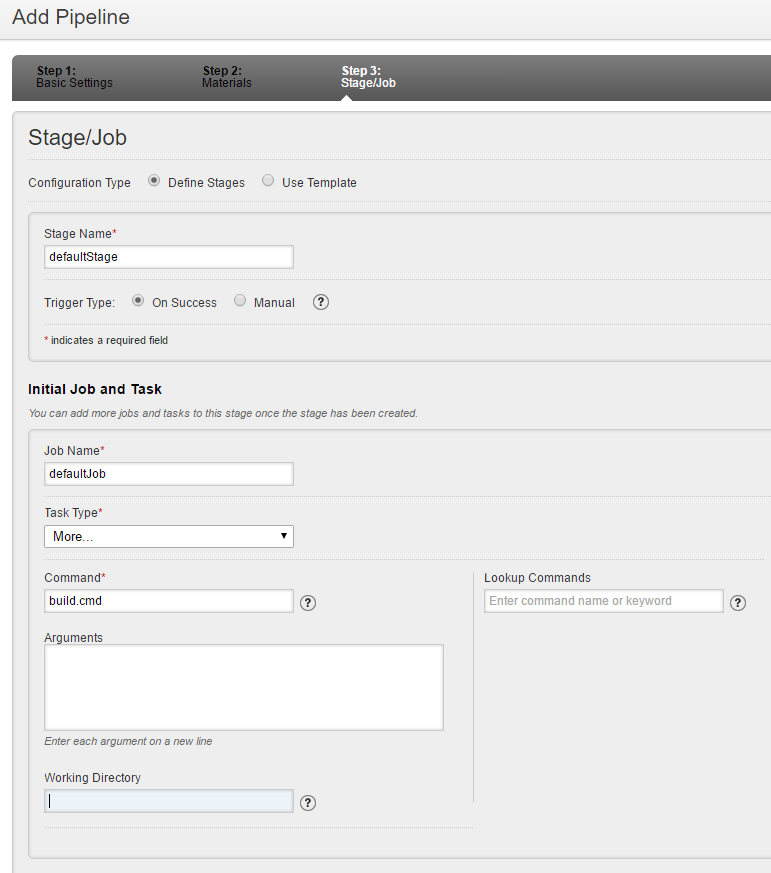
The third page sets up the stage/job. I’ve used the custom build.cmd I created in the setup.
After adding the build task, I unpaused the pipeline to make sure everything is wired up. GoCD will show the status go to orange and then green after the pipeline has finished.

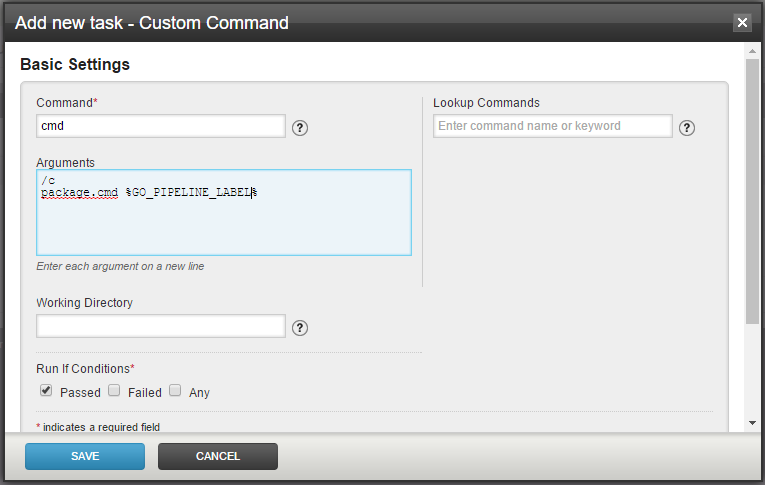
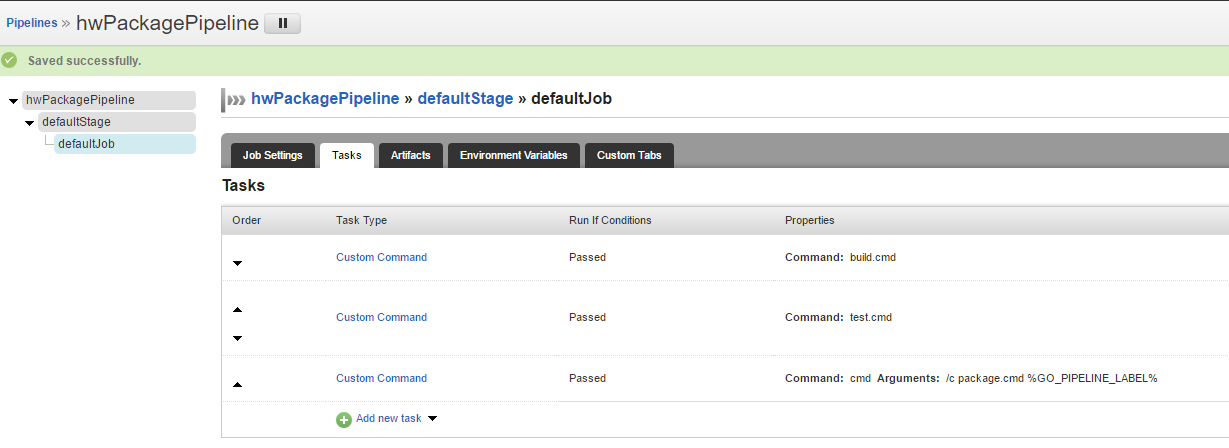
Now I can go setup the unit test and package tasks in this pipeline. I did this by going to the admin navigation and clicking on pipelines. Then clicked on the edit of the pipeline I created above. Then clicked on the defaultstage and defaultjob. Then I added in the unit test task which just calls test.cmd. The package task is a little different because I want to pass in the build number as a variable to the package.cmd.
Here is a view of all the tasks I setup in the defaultjob.
From the pipeline view if you click on the green bar you can view the job console ouput. I confirmed the label was updated correctly during the package task.
19:04:59.567 Start to execute task:
19:04:59.598
19:04:59.598 C:\demo\GoCD\Agent\pipelines\hwPackagePipeline>IF [2] == [] GOTO error
19:05:00.022 Project hwPackagePipeline (.NETCoreApp,Version=v1.0) was previously compiled. Skipping compilation.
19:05:00.072 Producing nuget package "hwPackagePipeline.1.0.0-2" for hwPackagePipeline
19:05:00.118 hwPackagePipeline -> C:\demo\GoCD\Agent\pipelines\hwPackagePipeline\_build\hwPackagePipeline.1.0.0-2.nupkg
19:05:00.118 Producing nuget package "hwPackagePipeline.1.0.0-2.symbols" for hwPackagePipeline
19:05:00.122 hwPackagePipeline -> C:\demo\GoCD\Agent\pipelines\hwPackagePipeline\_build\hwPackagePipeline.1.0.0-2.symbols.nupkg
19:05:00.184 Current job status: passed.
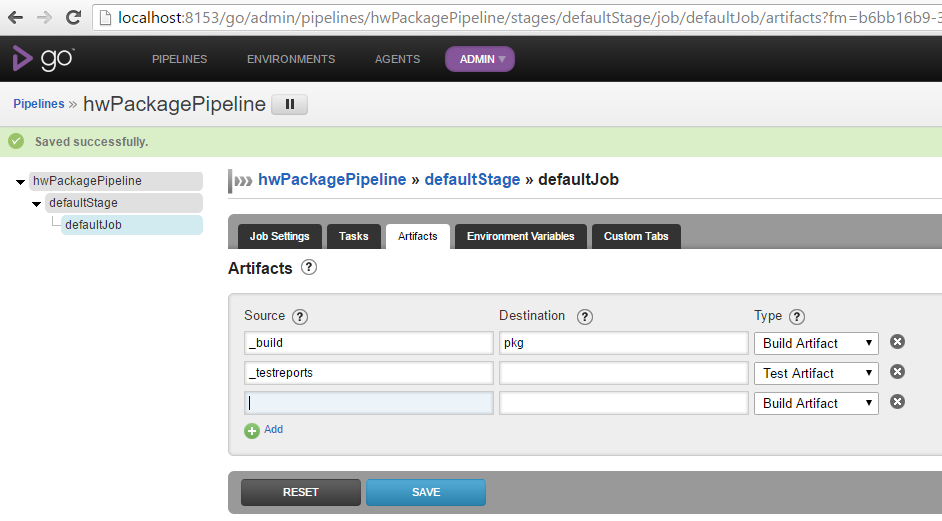
Now that the build, test, and packaging is done I can move on to creating a pipeline for acceptance tests and deployment with required approval. The second pipeline will use the first for it’s material. Before we can create the second pipeline we need to go into the first and setup the jobs build artifacts.
Note: Also by adding a test artifact GoCD will display the results in the tests tab. You can use Go with any XUnit style xml reports.
Now via the admin tab and selecting pipelines, I can click on “Create a new pipeline within this group”. On step one I’ll name the new pipeline “hwDeployPipeline”.
Note:GoCD supports pipeline templates. Deployment pipelines would be a good use case for a template.
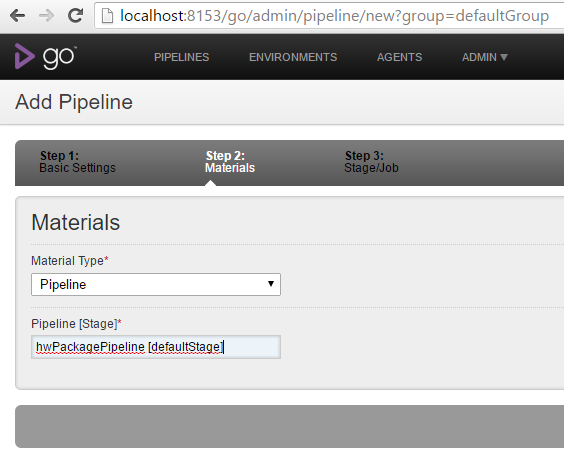
For step two the material will be “Pipeline” and the pipeline will be the stage we created earlier. GoCD has autocomplete text boxes. I didn’t have to type the stage name in the screenshot below.
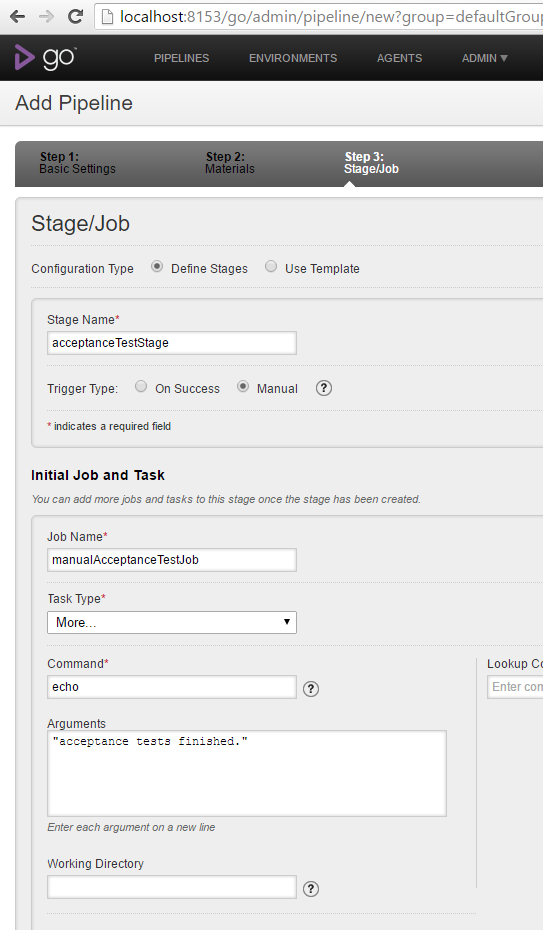
In step three, I setup a manual stage and a task that represents acceptance tests were performed. If a step in your pipeline is not yet automated this could be a way to incrementally work towards automation.
Now I can save the new pipeline and unpause it. If we now go back to the main pipeline page and trigger the build we will see the first pipeline build and the second one will wait to be manually triggered. Once you click into the second pipeline and click on the purple arrow button it will run.
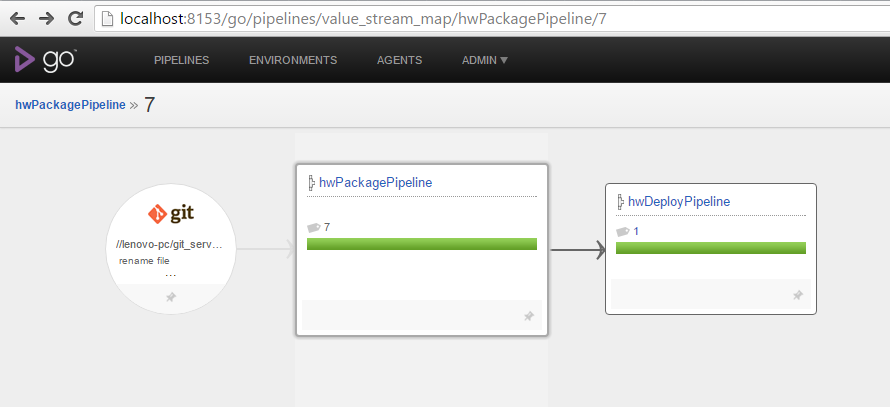
The value stream will look like this after both pipelines complete. You can view value stream map for any build by clicking on the build label.
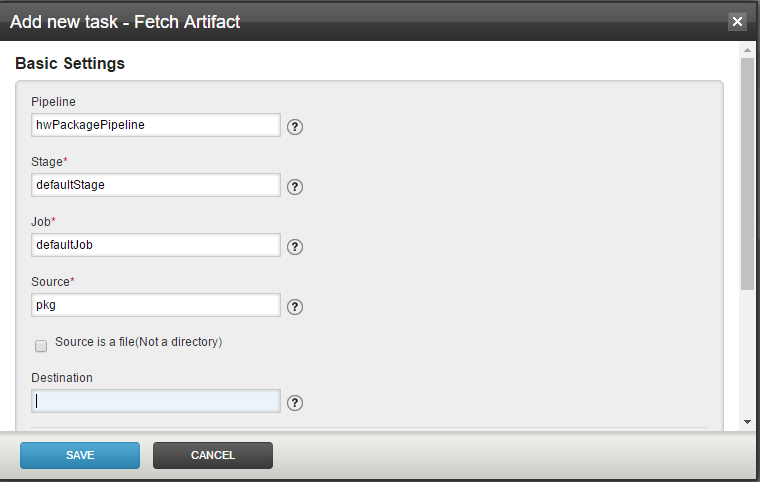
Now we can setup a task that fetches the artifacts from the first pipeline and another task to deploy. Here is what setting up a fetch task would look like. The “pkg” folder name came from the artifacts configuration from the first pipeline.
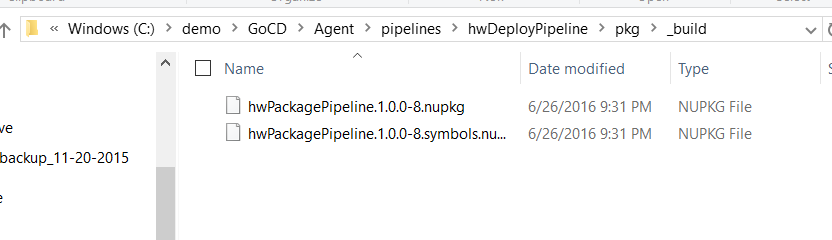
Now if we trigger the first pipeline again and manually trigger the second one we can see the agent was able to fetch the build output from the first pipeline.
21:31:26.919 Start to execute task:
21:31:26.920 Fetching artifact [pkg] from [hwPackagePipeline/8/defaultStage/1/defaultJob]
21:31:32.017 Saved artifact to [pipelines\hwDeployPipeline] after verifying the integrity of its contents.
21:31:32.052 Current job status: passed.
Review
GoCD has a very good model and abstraction for how to build deployment pipelines. For example, when working on a task like packaging you don’t need to worry about anything else. It leads you to using smaller focused scripts in the right places. Also, the concept of pipelines as a material give a powerful way to break up your deployment process. In my example I used another pipeline, setup with an initial task to wait for manual approval. Then after approval a fetch task runs which copies the artifacts from the build of the first pipeline, which then can be used for deployment.
Leave a Reply